Stefanos Zarakovitis
Game / Level Designer
Job hunting status: very soon...

Projects
![Retro 3D Shooter [Team]](assets/images/image07.jpg?v=7ba3bc1e)
A retro FPS in the style of Quake/Doom, where you control a gun and sword wielding nun to explore and clear out a robot invested pyramid.Made in the custom engine: Gudenuf, using Trenchbroom to create each level within an 8 week project duration in a team of 15 people.


A Metroidvania where you play as a strong-willed girl determined to challenge the tyranny of the mob leader and free Chinatown from their oppressor.Made in Unreal Engine 5 with a team of 30 people. The development of this project lasted from September 2022 to June 2023.

Unreal Tournament Map
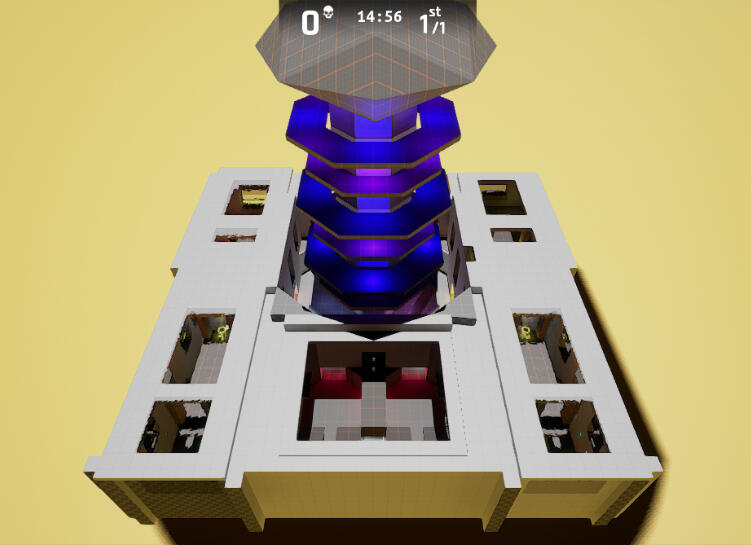
DeathmatchWhat makes this map stand out is the landmark in the middle.
A large tesla coil that every other room is connected to, that can be seen at all times.
Smaller projects
GB STUDIO - SMALLER SPACE
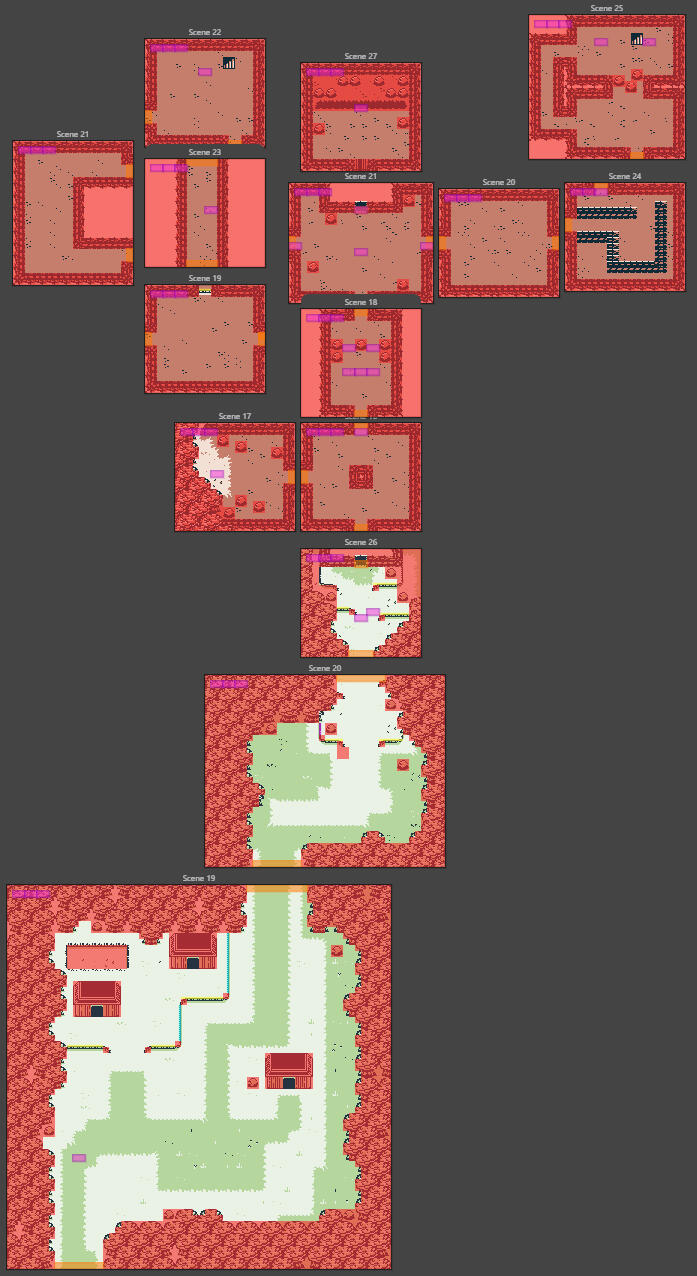

A short and casual game about throwing sushi into the mouths of monsters to avoid becoming food yourself.

A proof of concept for a survival game with resource managing elements. Control a mobile city that is constantly on the move in search of new resources.
About me
I'm Stefanos Zarakovitis, a game designer in training with a deep love for everything related to video games. My favorite genre varies with my mood, but I tend to play a lot of JRPGs.There's nothing I'm more passionate about, which is why I strive to immerse myself even further in the medium.As a designer, I've had a strong appreciation for level design even before I started making games. I have strong opinions on the subject and plenty to say about it across most genres.Aside from video games, I have the overly expensive hobbies of card games and figure collecting. I also enjoy the occasional DnD campaign and other tabletop games.
SUB NIVIS
About
SUB NIVIS is a first-person shooter inspired by classics like Quake and DOOM. The game was made in a custom engine, and uses Trenchbroom for its level creation.
Genre: FPS
Engine: Gudenuf (Custom Engine)
Team Size: 15
Duration: 8 weeks
Platform: PC
My Roles: Lead Designer, Level Designer
My Contributions
Level Design
My primary contribution to this project is with the planning, creation, testing and iteration of its levels.
Here is my process broken up into sections:
Cabal
Combining different level 'chunks' into one larger level.
I was in charge of combining mine and the other level designer's chunks into our game's final levels.
This video showcases the connection of 2 completely differently made sections of the level. In this case they connect via a large gate.
Shown below are 3 separate gameplay moments individually created and playtested. I then combined them into one,
adding visuals to both to keep them consistent with each other.
These visuals can be seen at the bottom of the page in the 'setdressing' section as well.
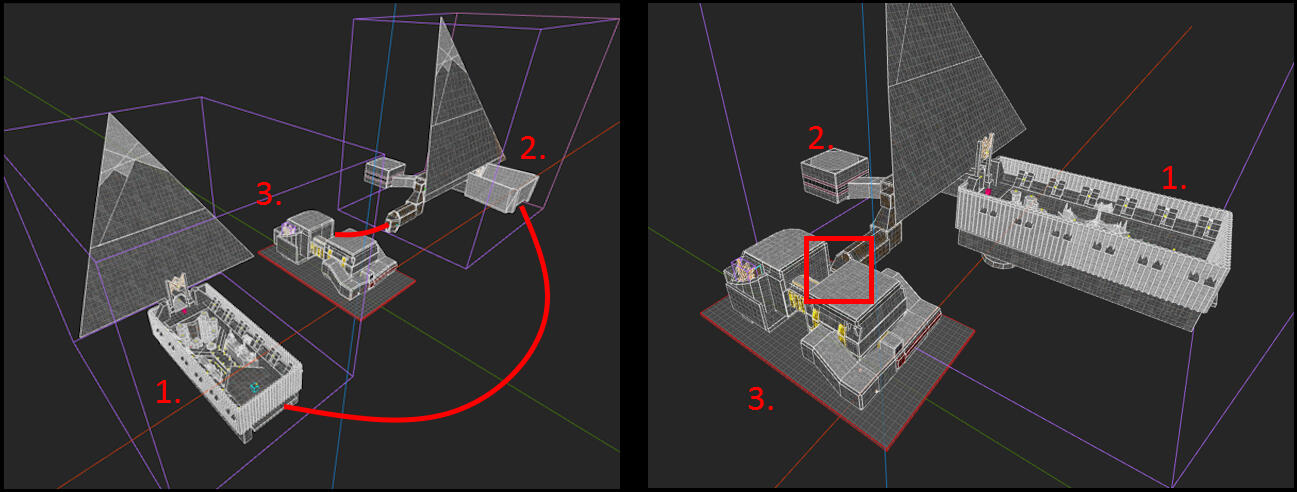
The red square is where the video shown above takes place
Planning
Gameplay moments didn't have too much planning.
The principle was to create as many cool moments as possible, so simple sketches were recreated in engine and then tested before being prettied up.
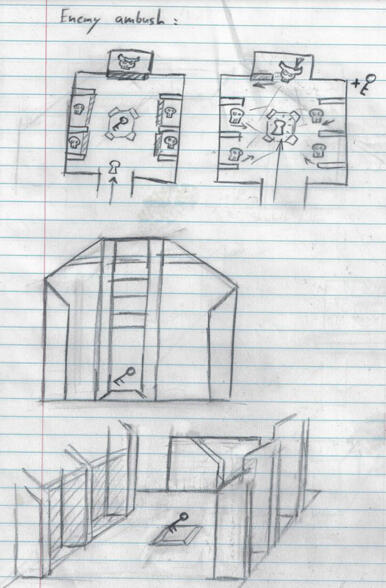
Initial sketch for a gameplay moment. A very obvious ambush scenario forcing the player to pick up an important key which causes enemies to attack.
A simple recreation in engine for testing purposes. This particular idea was well received.
After testing, the room is dressed up in the same style as the rest of the game to keep visual cohesion.
REDO SKETCH ON PC FOR VISUAL CLARITY AND TURN THOSE SEPERATE IMAGES INTO A JUXTAPOSE
ALSO SHOW MORE OF THEM
Set-dressing
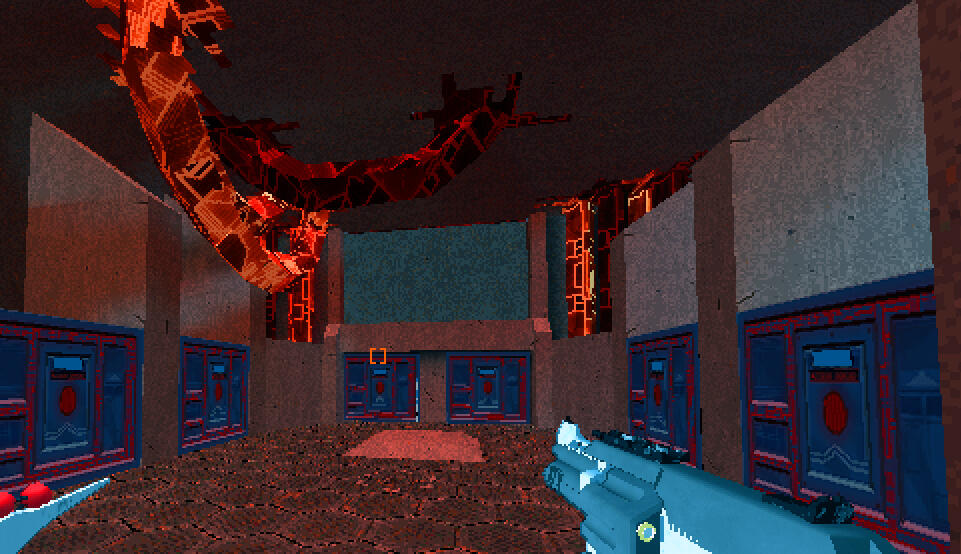
As previously mentioned, I added visuals to each level after combining level chunks using the cabal method. By incorporating holographic screens and large electrical wires, I transformed what were previously separate gameplay moments into one cohesive level.


This was also a great opportunity to make roadblocks more interesting than simple walls by fully utilizing the environment.
Learnings
Cabal method
One of my biggest lessons from this project was discovering the cabal method and learning how to use it.What I appreciate most about this method is that it highlights the strengths of each level designer and integrates them into a cohesive whole. It also significantly improves team communication, which is essential for successfully implementing this method.
Custom engines
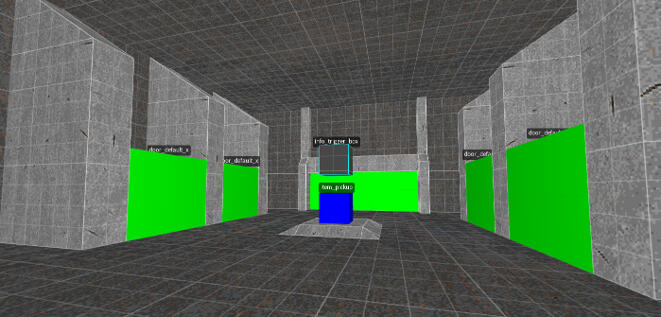
This was my first experience working with a custom engine.The main advantage was the ability to collaborate closely with our programmers to add anything we needed for the levels. If I wanted a new level feature, like a door with specific triggers, I could simply request it.Thanks to the ongoing communication with the programmers, it was always clear what was feasible and what wasn't throughout the project.
Being the lead designer
This was my first time acting as the lead designer, which came with some challenges.
For example, I served as the bridge between my fellow designers and other disciplines.One difficulty I learned to work with, was ensuring everyone's work was acknowledged and not overlooking anyone while reviewing what my fellow designers were doing while sharing that with the rest of the team.
Unreal Tournament Map
About
A deathmatch map called DM_Lightningrod.Every room has a different layout that facilitates the weapon found in it and has their own ways of traversing around the space.The large landmark in the middle acts as a striking visual flare and a risk vs reward challenge. It may contain lots of health and other strong pickups, but leaves you vulnerable from all sides.
The Map (EACH SECTOR)
SCREENSHOTS GO HERED:\Epic Games\Epic Games\UnrealTournamentEditor\UnrealTournament\Saved\Screenshots\Windowshttps://juxtapose.knightlab.com/
Shown above are the conditions of satisfaction in question.
On the left is a very early version and the right has the latest one. While specifics change over time, it was still a very consistent process.
The data itself came from playtests that I personally curated, conducted with enough players for a proper online deathmatch in game.
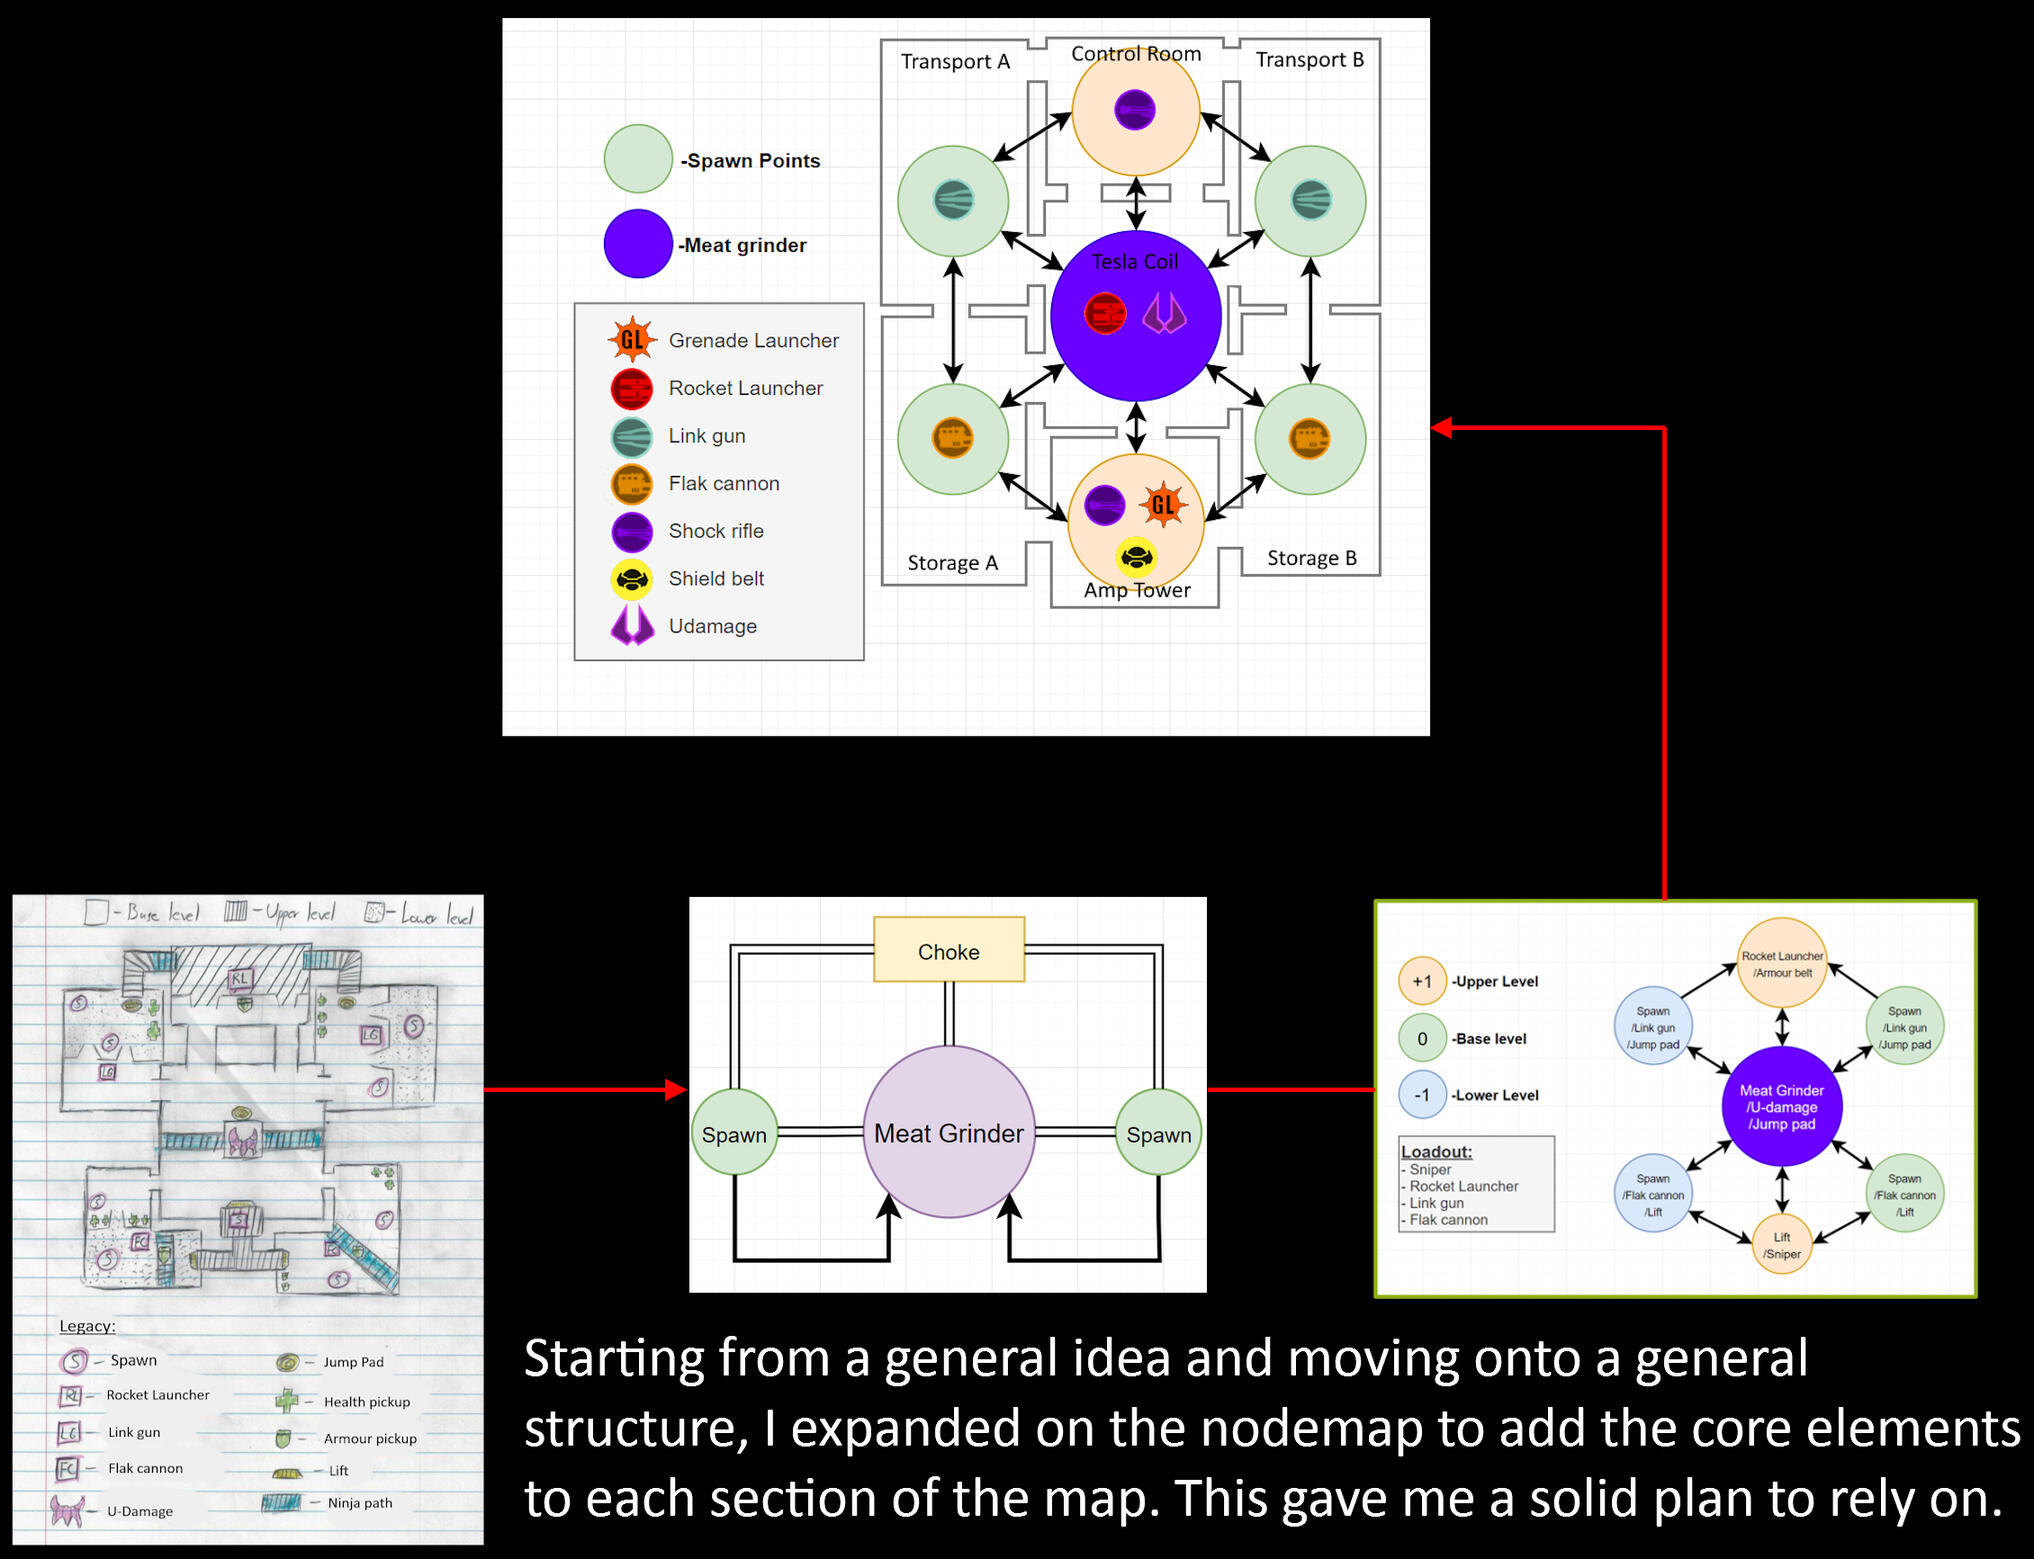
Nodemap
The nodemap was used here to maintain simplicity and clarity. It provided a visual structure that was easy to understand and manage while working on a deathmatch map like this.
Having this at the ready helps keep the macro consistent while tweaking the micro.
Playtests
A focus of this project is frequent playtesting and iteration. Hence, I had a playtesting session every week, using a condition of satisfaction document. I followed this document strictly; if something was too broken or underwhelming, I would focus on fixing it for that week.
Thanks to being in the Unreal Tournament Discord server, I had plenty of great playtesters.


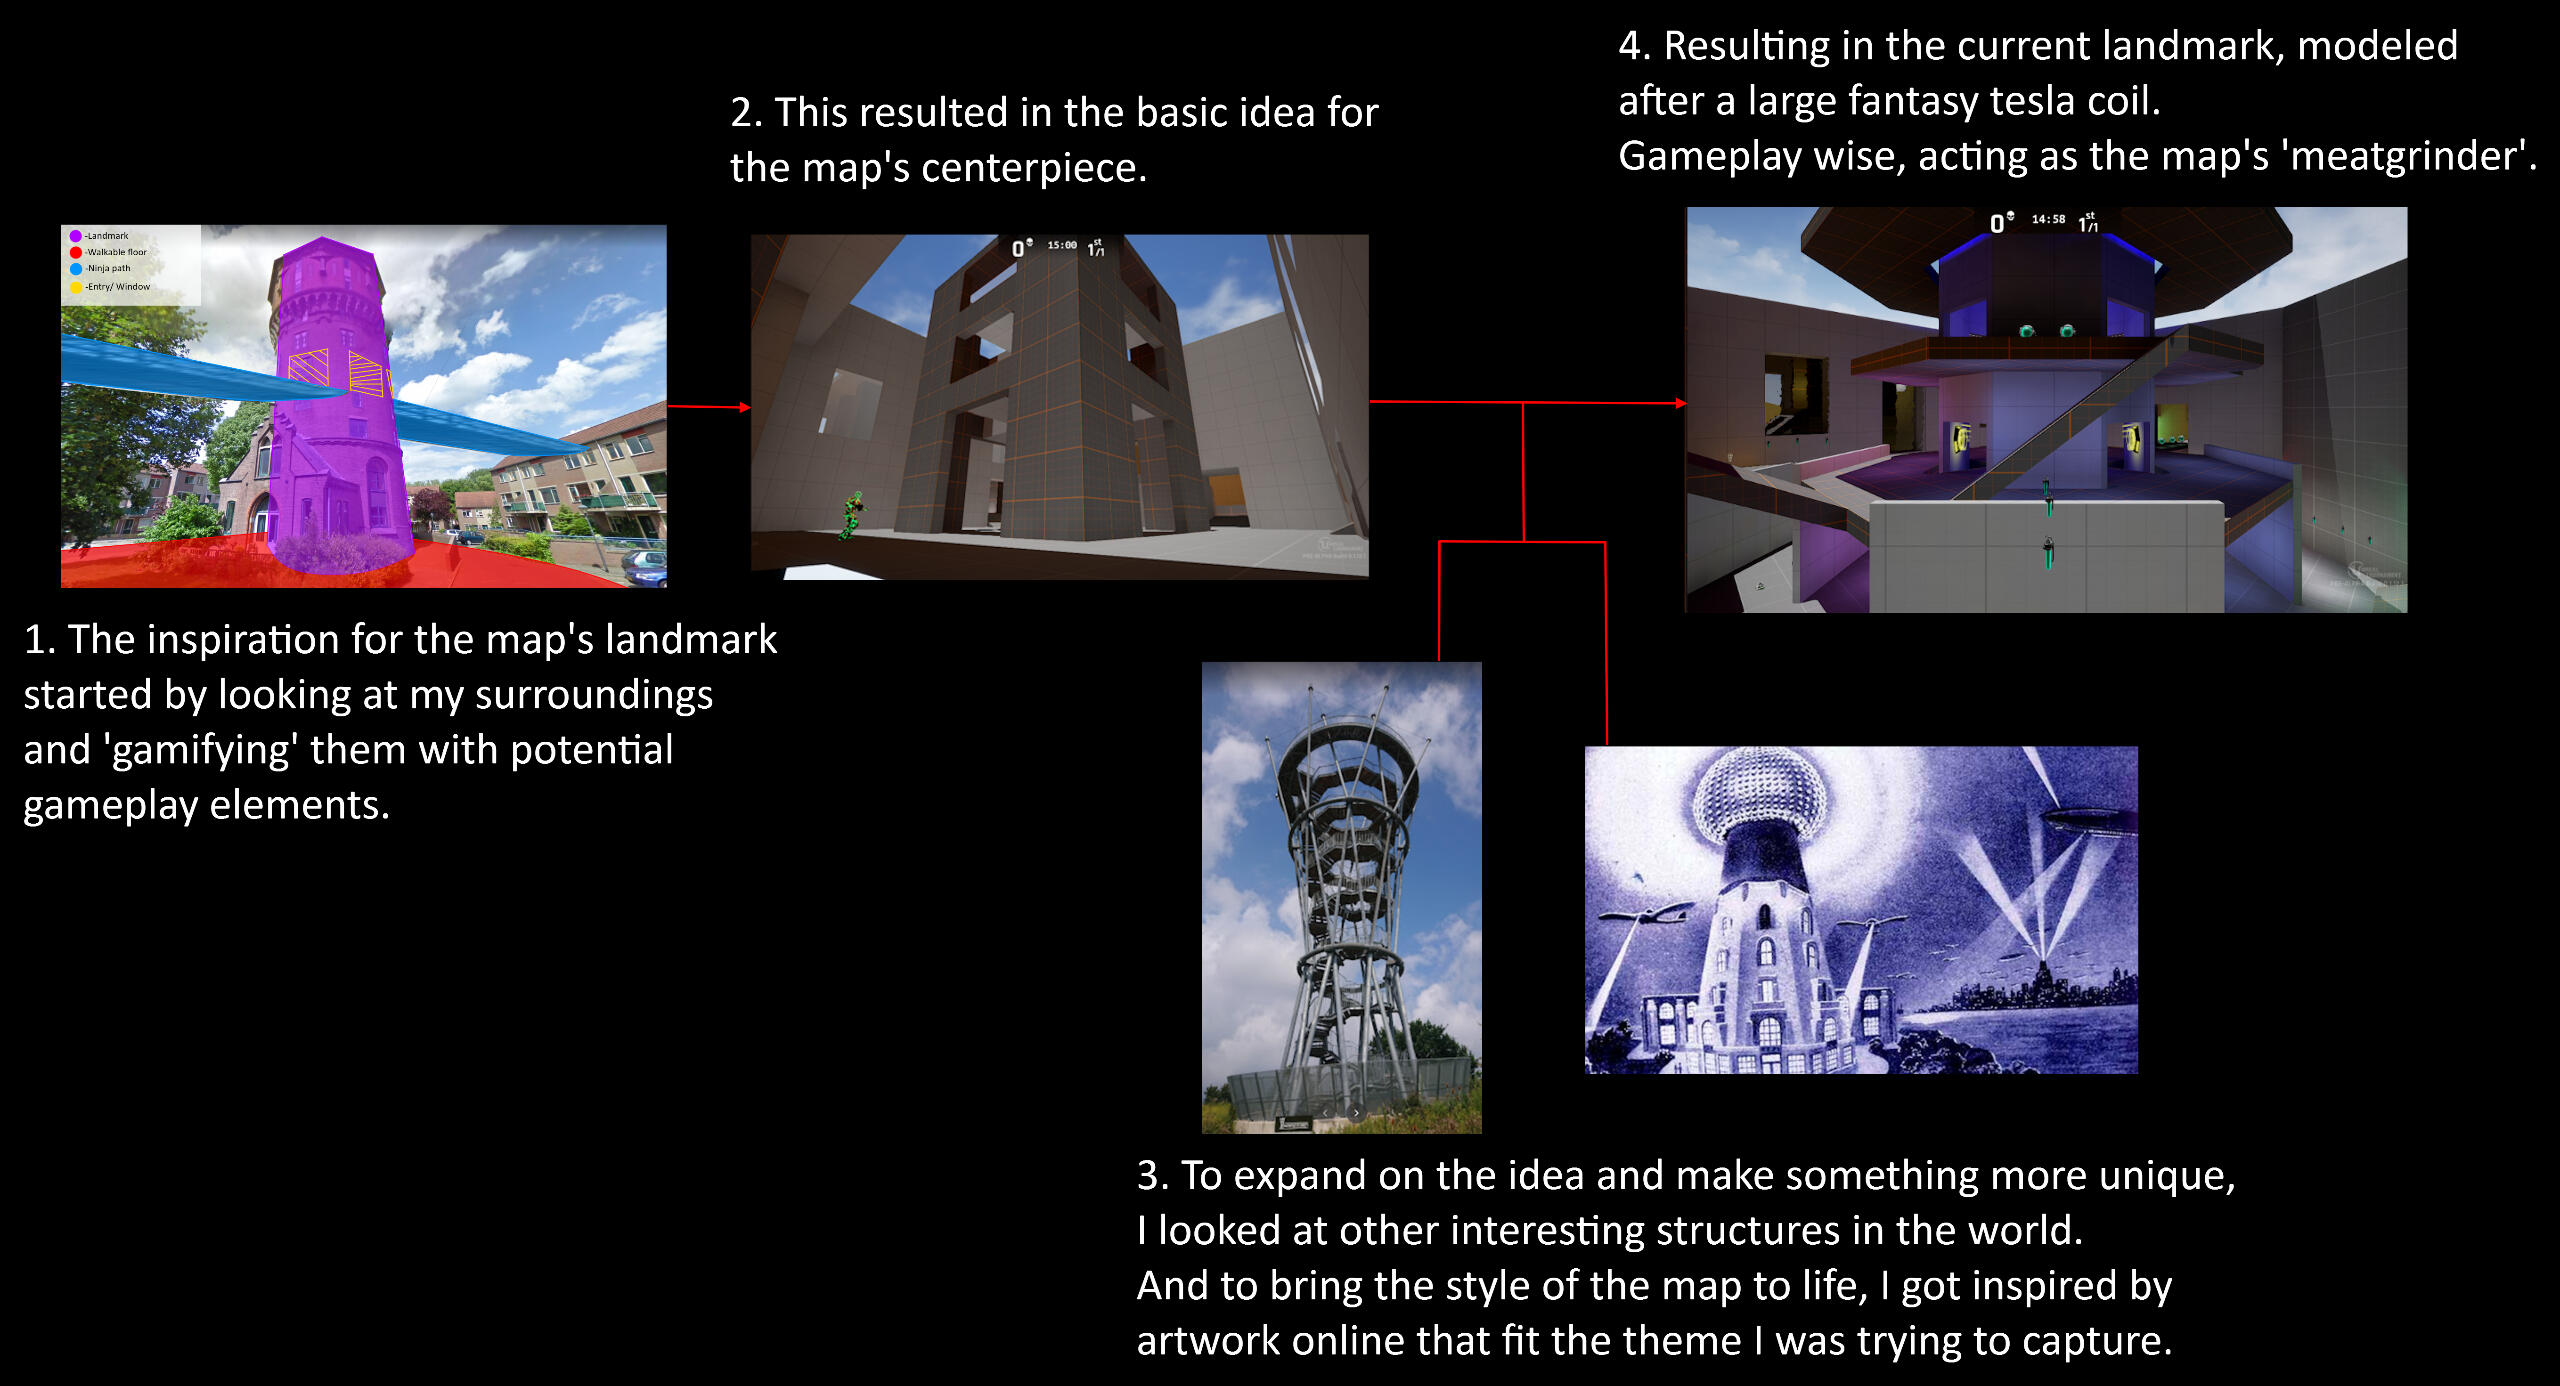
Inspiration in architecture
When creating the map, I used both the architecture around me and interesting landmarks online as inspiration.
By combining the two, I created my own landmark as a centerpiece to act as the 'meatgrinder', where players would see a lot of action.
Learnings
Adding to an existing game
Working with assets that were created years ago and ensuring they fit into the existing game was a very interesting and enjoyable challenge for me.Learning the do's and don'ts of Unreal Tournament map creation was just as important as making the map itself.This lesson isn't limited to Unreal Tournament; going through this process will help me in the future when working with other existing games and adopting the necessary mindset.
The right playtesters
One of the key lessons I learned from this project is the importance of choosing my test group and identifying valuable feedback.Unreal Tournament already has a dedicated fanbase, making it the perfect source for feedback. I could have asked random acquaintances, but since there's a Discord filled with passionate players who play custom maps daily, it made sense to reach out to them for playtesting data.
Learning from the community
There's a lot of different opinions floating around, but when they come from people who have invested hours into the game, there is much to gain from listening to them.For example, aspects like colour coding, the shape of specific ledges, the best placement for weapons, and the sizes of rooms, etc.While these examples are specific to Unreal Tournament, the same principle applies to any game with an existing and passionate fanbase.
S.P.L.I.C.E.D.
About
Genre: Metroidvania
Engine: Unreal Engine 5
Team Size: 30
Duration: September 2022 - June 2023
Platform: Steam
My Roles: Level design, QA, VFX
Reception


70000+
Added to Steam Library
3000+
Unique Players
Contributions
Level Design
My contribution to this project is various parts of the level, especially around the early to mid point in the game where the player receives their first power-up.
The design intention behind the level layout is to show that like in most metroidvanias, the goal isn't always to go right.The first video shows a section that is not reachable normally, hence the player is led down a set path with the expectation that they will be able to reach it eventually. This then guides them into one of the game's combat rooms which rewards the player with what they need by beating this encounter.
Care was taken to implement a looping gameplay structure, presenting challenges and subtly directing players toward solutions without providing explicit instructions.
A lot of time was also spent on making sure the level was playable.
Fixing and working around bugs, hitboxes, cameras etc.For example in the video shown below, there was an issue where the player could could shoot through the wall and hit a button that opens a door early. So, to fix this without tinkering with the collisions too much, it was efficient to simply modify the room and add a pillar which stops the player from doing this.
Save slot system
I created the first version of our game's save system.Like most metroidvanias, saving is done at designated save points placed throughout the game.This system allows for multiple save files as is quite common with games from this genre.
VFX
I created various simple visual effects.
This was my first time working on something like this, but I felt that it was needed to add more oomph.I also wanted to give important structures better visibility like the one on the left.
Learnings
Large teamsize
This was my first time working with a large group of 30+ people.The biggest challenge was effectively dividing tasks and maintaining consistent communication about the project's status, ensuring everyone understood what was being worked on and what still needed to be done.When using Perforce and Jira, setting clear deadlines was particularly important to keep the project moving forward.
Changing members
This project lasted an entire academic year. While I stayed from start to finish, many team members either left or joined throughout the project.When a teammate left, it was crucial to understand what they were working on and assign someone else to take over their tasks.New members joining presented a challenge. We needed to inform them about the project's current state and, more importantly, ensure they understood the core concept of the game. Having solid design pillars was extremely helpful in this process.
Long-term project
This was the longest project I've ever worked on, and the most important lesson I learned was knowing when to 'kill your darlings.'Recognizing when something I created needed revisions or improvements, and deciding which ideas and features to keep or discard, was crucial. It's better to have a few outstanding features than a lot of mediocre ones.

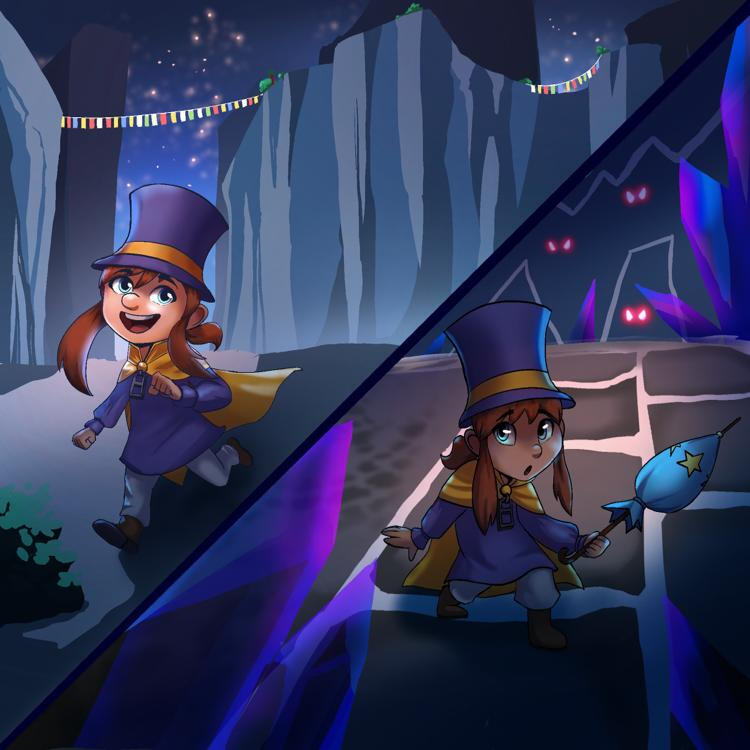
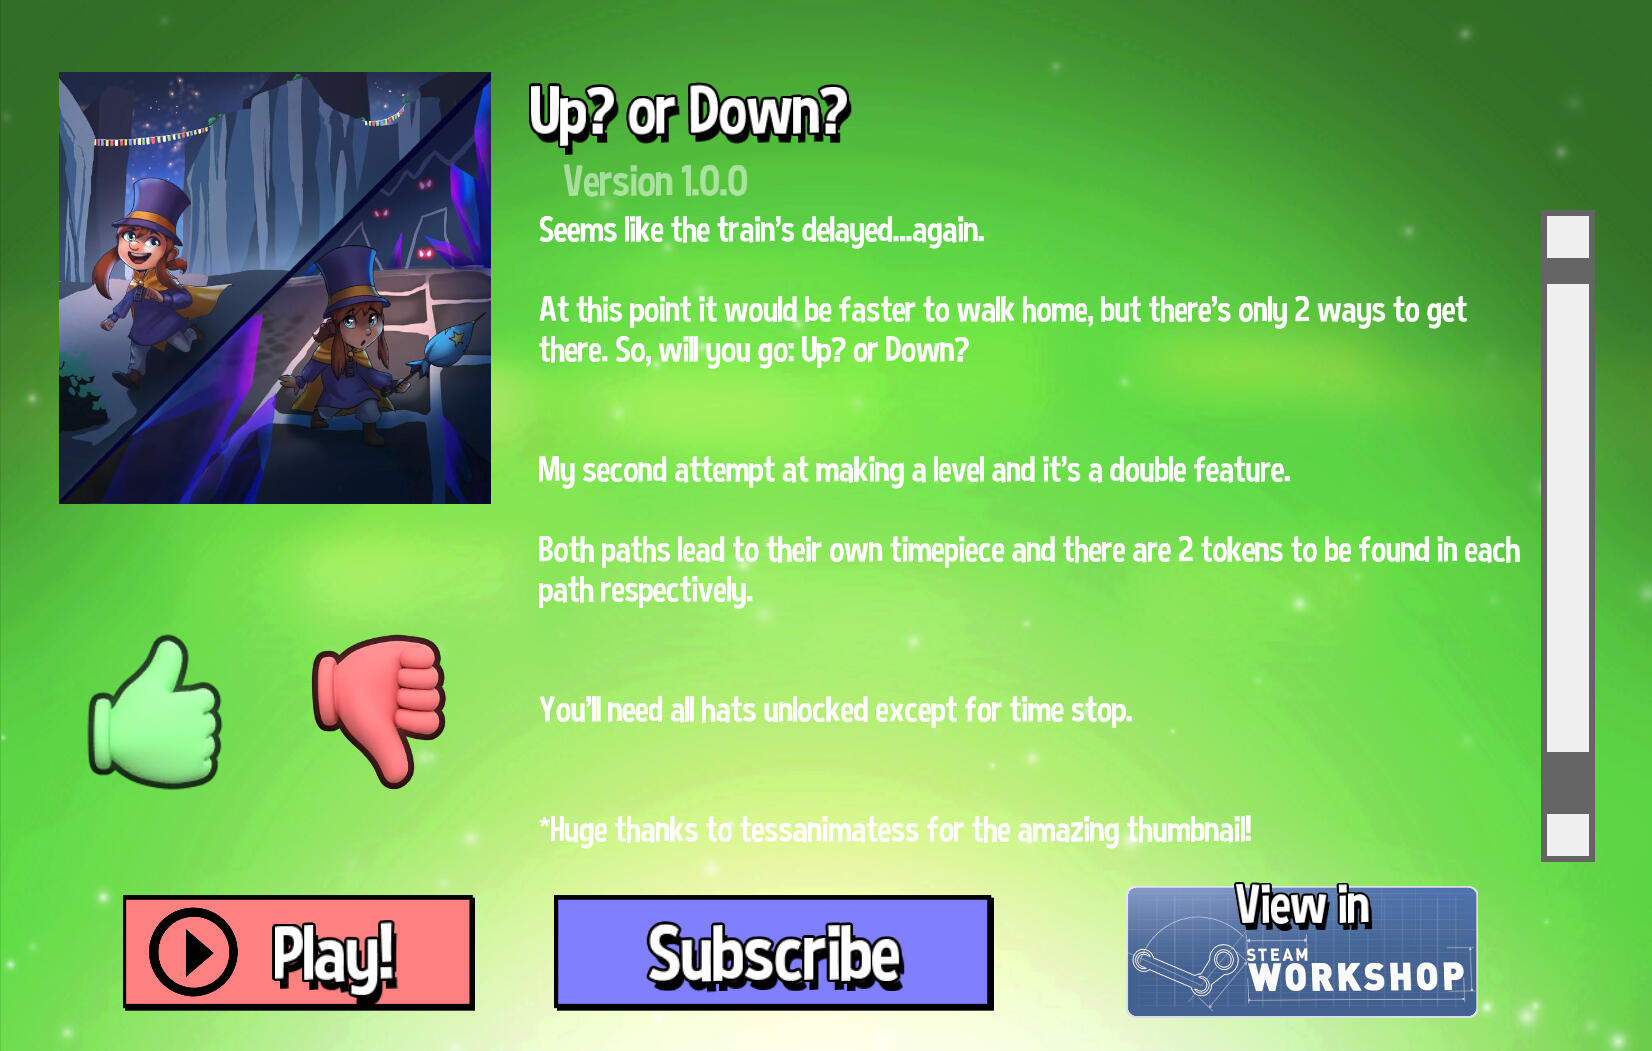
Up? or Down?
About
A 2 in 1 level mod for a Hat in Time.2 branching paths that are each their own level.
These levels have their own time piece at the end and each of them have 2 rift tokens and 1 yarn to collect.One path leads the player to a linear platforming challenge in the mountains, while the other takes place in an enemy infested cave.
The Level
Up
placeholder
Down
placeholder
Iteration
placeholder
Themes
placeholder
Learnings
Reverse engineering
text goes here
Community interaction
lorem ipsum
Keeping it simple
ipsum lorem

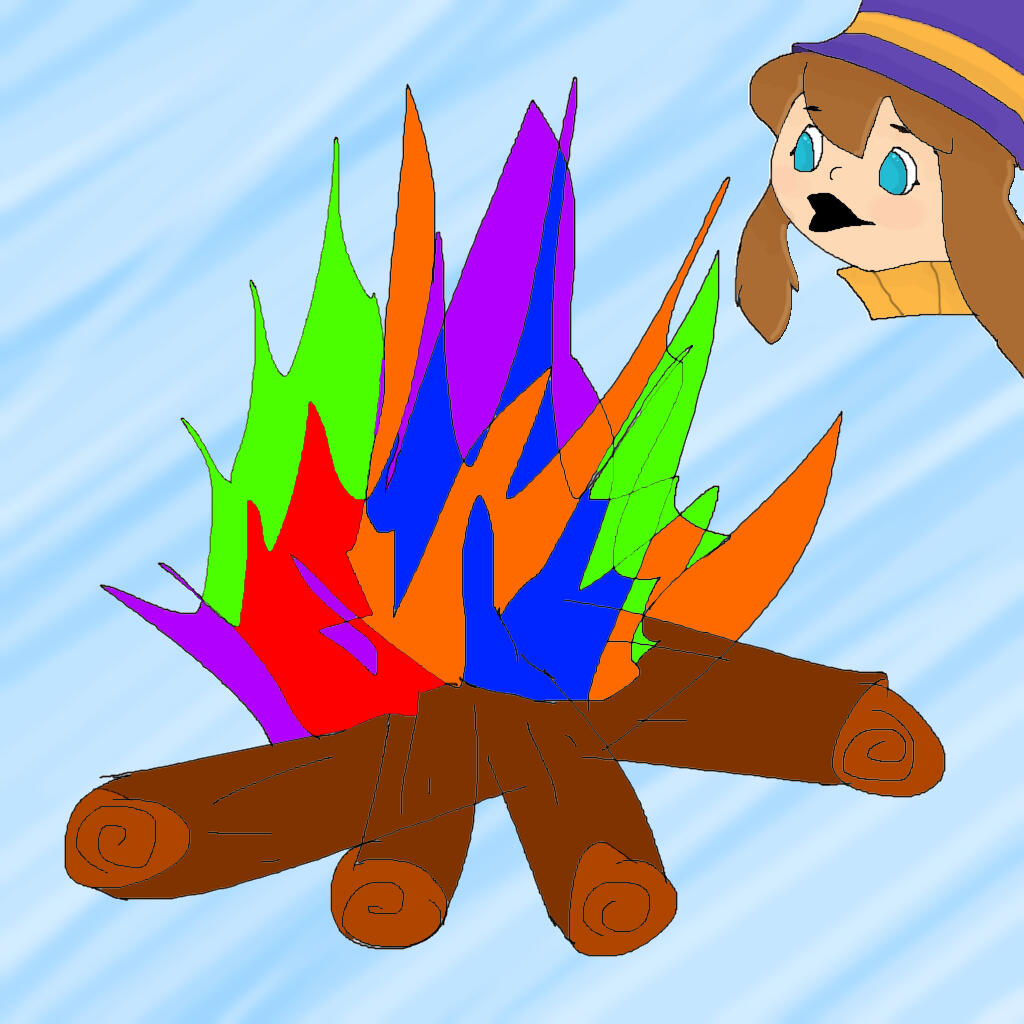
Bonfire Crossroads
About
Short bonfire based blhfhfhfhf
The Level
Part 1
placeholder
Part 2
placeholder
Themes/Inspiration
placeholder
Learnings
Reflection of a new modder
text goes here
Learning new tools
lorem ipsum
Bolt Forest
About
My first foray into modding (a.k.a. making a romhack) in Super Mario 64.A simple map with objectives you could expect in any regular level of the base game.Themed around a forest of bolts and the factory overseeing it, with each challenges based on and facilitated around them.
The Level
Each challenge lined up
placeholder
The plans
placeholder
Iteration
placeholder
Themes/Inspiration
placeholder
Learnings
Fan-made tools
text goes here
Capturing the essence
lorem ipsum
Proper planning
I.E. checking other hacks out